


Next Day Delivery Available

Oven not heating up? - How to replace an oven element
A fan oven that has stopped heating up or is not getting hot is one of the most common oven problems that oven repair & cooker repair engineers are called out to. The problem in most cases is simply a faulty fan oven element which is a simple DIY task to replace. To employ the services of a cooker repair company to replace an oven element would cost you in the region of £75 - £125, whereas a replacement oven element can cost as little as £10!
Will it be obvious that my oven element has failed?
There are several different ways that a faulty oven element will present itself.
- Often, but not always, the RCD in your consumer unit will trip during cooking and the power to your oven will be lost. When you re-set the RCD and turn your oven back on everything will appear to be working fine; the fan will be working, the thermostat light (if you have one) will be lit, but there will be no heat. Or,
- When you come to remove your food from the oven ready to serve it you’ll notice that it hasn’t cooked properly and the oven is either cold or just warm.
Can I tell just by looking at my element that it has failed?
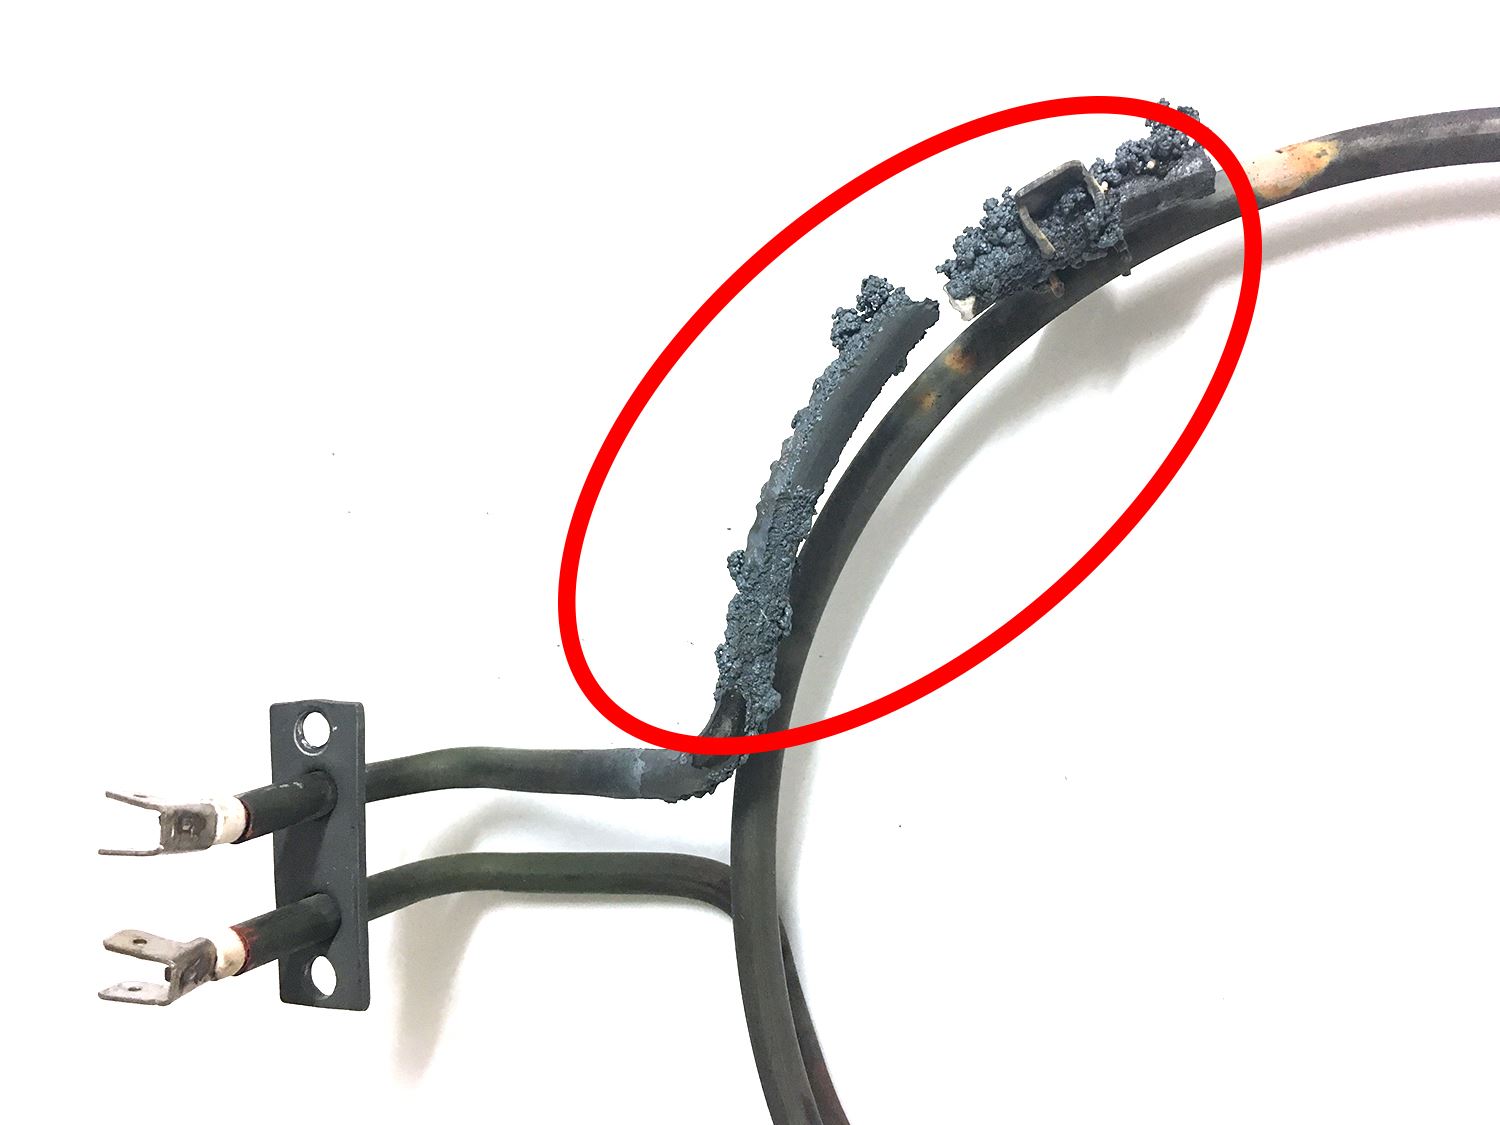
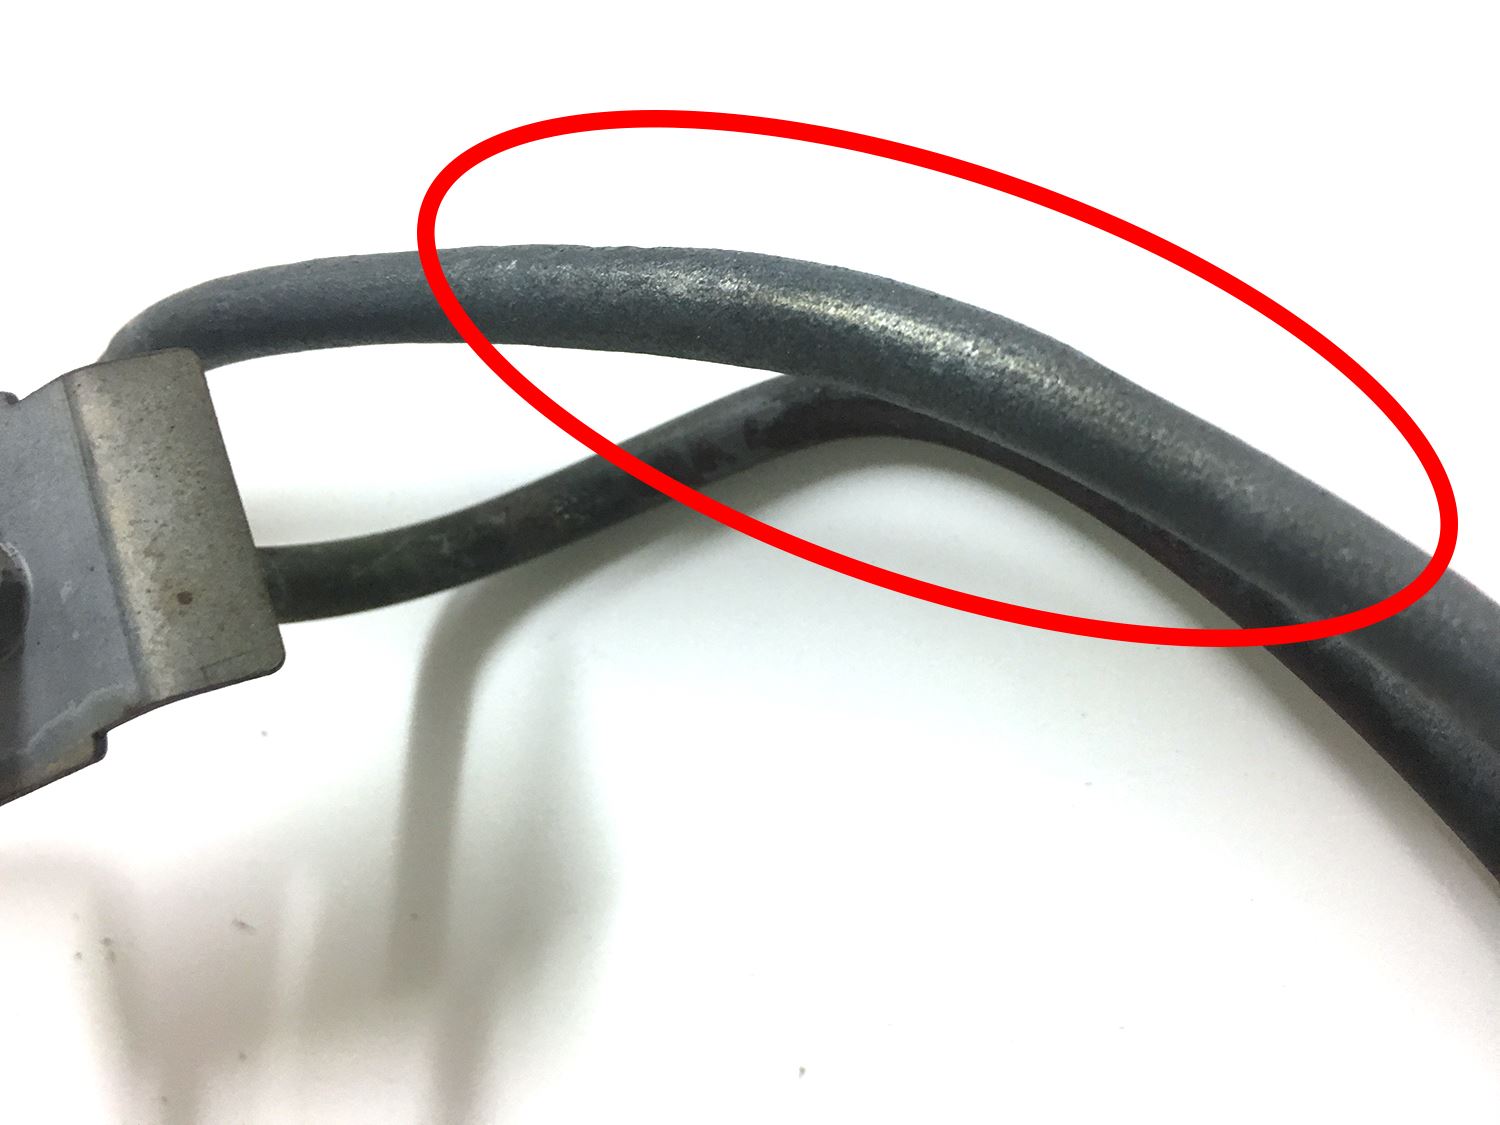
Sometimes visual inspection of an oven element will be enough to know that it is faulty. Any burning or bulging will be enough to confirm that a replacement oven element will need to be fitted. See the 2 example images below; both oven elements have failed, however one is more obvious than the other:
Faulty Oven Element - Obvious Burning
Faulty Oven Element - Less Obvious Bulging
However, in many cases there will be no obvious visual signs that your element has failed.
How to replace an oven element
Video transcript:
Whether your oven is built in or freestanding, single or double, the first step of the repair is to remove the ‘back-plate’ from inside the fan oven. Elements used to heat fan-assisted ovens are, in most cases, located at the rear, behind the back plate. Back plates vary in how they are fixed in place, but normally they are held by between 2 and 6 screws.
Once the back plate has been removed the fan oven element and the fan blades will be seen. In many cases cooker elements will show visual signs of failure; There may be signs of burning, blowing, bulging, or splitting, in a particular area of the fan oven element. This is confirmation that your oven element need replacing. Be aware, however, that in many cases there will be no obvious visual signs of failure whatsoever. With the element exposed It will also now become apparent if you need to gain access to the rear of the oven to remove the element.
In most cases there will be no need to remove the oven in order to complete the repair. If the element is simply screwed in place with the screw heads showing then you are in luck. It is just a matter of removing these screws and disconnecting the wires. In these circumstances once the fixing screws have been removed the element will come away from its position. Be careful not to inadvertently pull off the electrical wires that are connected to the element as you pull the element free. In some instances manufacturers leave hardly enough wiring which can make it difficult to remove the connections. If you happen to pull off a connection the wire may remain in the rear of the oven and you will have to gain access to the rear.
If the element has been secured by screws from the rear of the cooker then the oven will need to be removed from it's housing (built in ovens) in order to remove the back cover. The screws holding the cooker element in place can then be removed easily.
Always ensure that you make a note of which way round the wires are connected to the oven element before you remove them. We recommend that you replace your element with the genuine part (where possible) which are available direct from us - view all oven elements.

Your oven will not work until the clock/timer has been re-set after replacing an oven element.
Can I test my oven element with a test meter?
If you have an electrical test meter to hand you can use it to test your oven element for continuity. Testing for continuity is simply checking if there is a break in the element. The following step-by-step video demonstrates how to use a multi meter to test an oven element.
Video transcript:
Hi I’m Lee from Ransom Spares and I’m going to be showing you how to us a multimeter to check if a fan oven element is faulty or not.
For an oven element to work electricity needs to flow from one terminal to the other. If there is a break in the circuit (i.e. the element has burned out) electricity will not be able to flow and the element won’t heat up.
If the element is still fastened inside the oven the before carrying out any repairs make sure that the oven is disconnected from the mains and the wires attached to the element terminals have been removed.
With the multimeter turned on and the ohms setting on 2000 ohms we place a lead on each terminal. If we get a reading from the meter as we have on this element then the element is working fine. If we don’t get a reading then the element is faulty and a replacement will be required.
That’s how you test an oven element with a multimeter. The multimeter used in this video and oven elements can be found on the ransom spares website. Thanks for watching!
Your oven will not work until the clock/timer has been re-set after replacing an oven element.
By Lee Gilbert
